Proper planning and reliable navigation are the foundations of a safe and successful Continental Divide Trail experience. As part of CDTC’s mission to provide accessible trail information and education, we proudly offer free, comprehensive mapsets using official US Forest Service data.
While many hikers know about our Interactive Map for checking current fire closures, reroutes, and water sources, there is a hidden feature that often goes unnoticed: you can download our detailed, half-mile scale PDF section maps directly from the map interface! Whether you are planning a weekend section hike or a full thru-hike, here is a quick, step-by-step guide on how to pull the exact PDF maps you need.
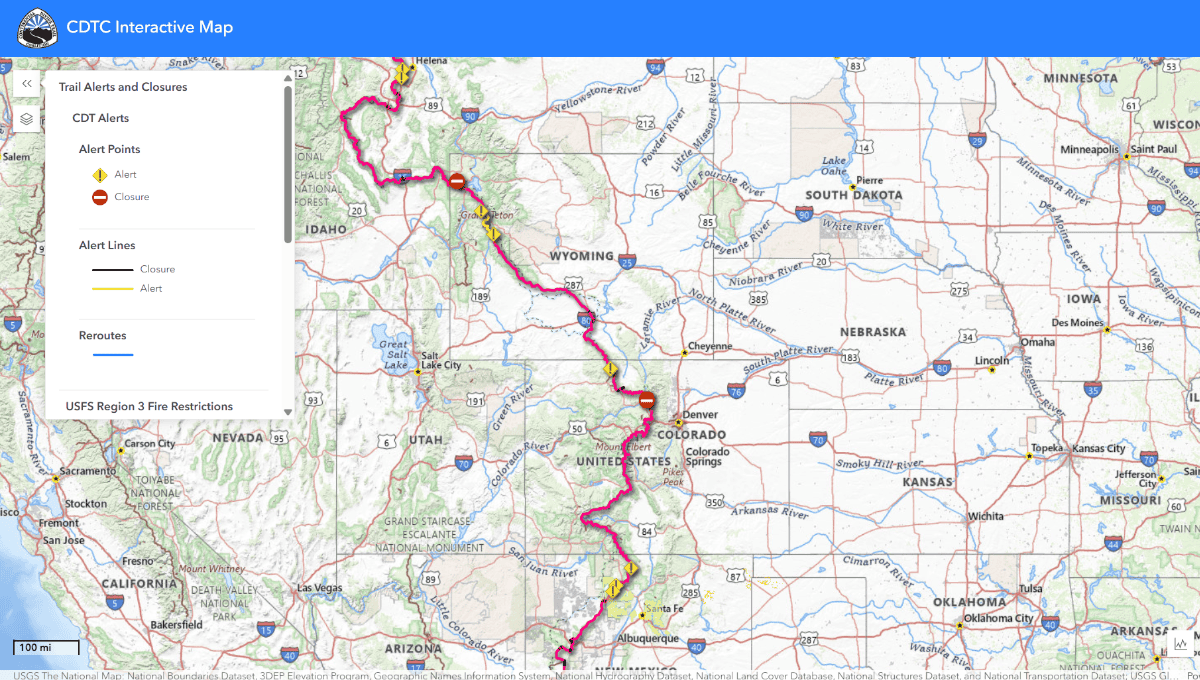
STEP 1: Open up the online CDT Interactive Map.
Access the Interactive Map by visiting our direct map link here.
The map works on both desktop and mobile, but we highly recommend using a desktop or laptop computer for the best map-viewing and downloading experience.
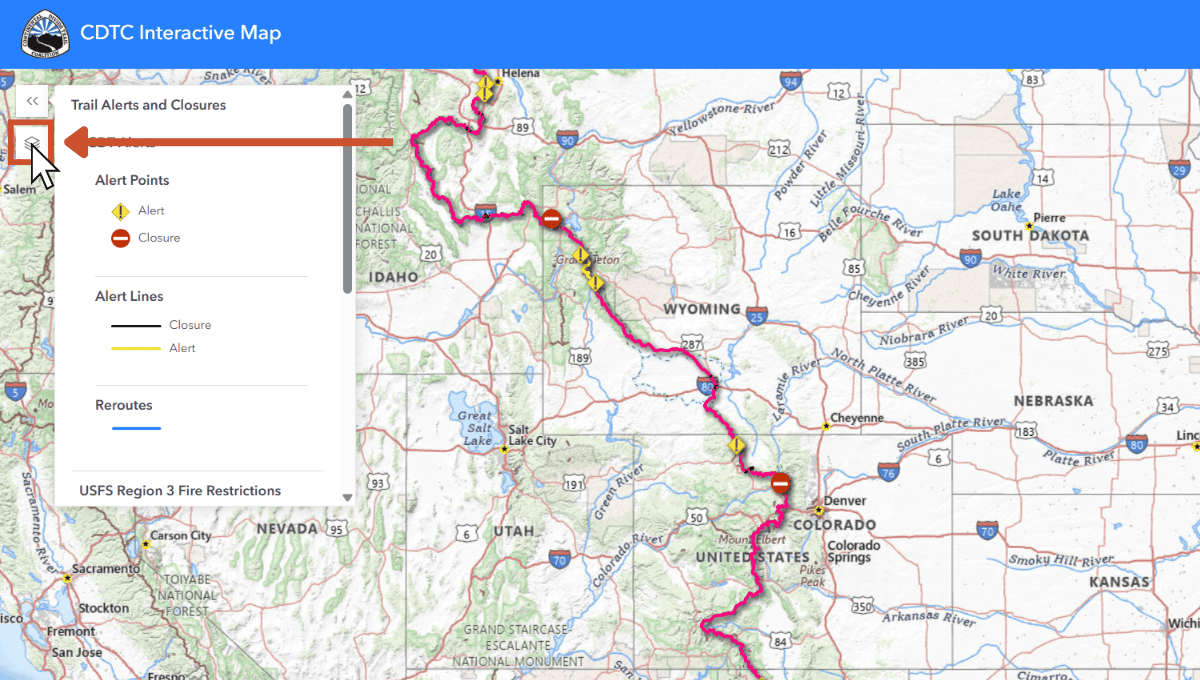
STEP 2: Click "Layers" in the top left of the interface.
On the left side of your screen, you will see a small vertical menu bar.
Click the “Layers” icon (it looks like a stack of three squares or sheets of paper).
This will open the main menu showing all the available data layers you can toggle on and off.
STEP 3: Find "Mapset Pages" and click the small eye icon to unhide them.
Scroll down the Layers list until you find the “Mapset Pages” option. By default, this layer is hidden to keep the map uncluttered. Click the small eye icon with a slash through it next to “Mapset Pages.”
Once clicked, the slash will disappear, and a series of purple grid boxes will populate over the CDT route on the map.
")
STEP 4: Zoom in and find the Trail Section of interest and click the rectangular square.
Use your mouse or trackpad to zoom in on the specific geographic area or trail section you are planning to hike.
Each purple rectangle represents a dedicated mapset page.
Click anywhere inside the rectangle that covers your desired section.
")
STEP 5: In the modal box that opens, click Low or High Resolution to view that section map.
After clicking the rectangle, a small white information window will pop up containing details about that specific map page. Look for the section labeled “Download Version 4.0” and click either the High Resolution or Low Resolution link.
💡PRO TIP: We recommend High Resolution if you plan to print the map, and Low Resolution if you are saving space on a mobile device.
")
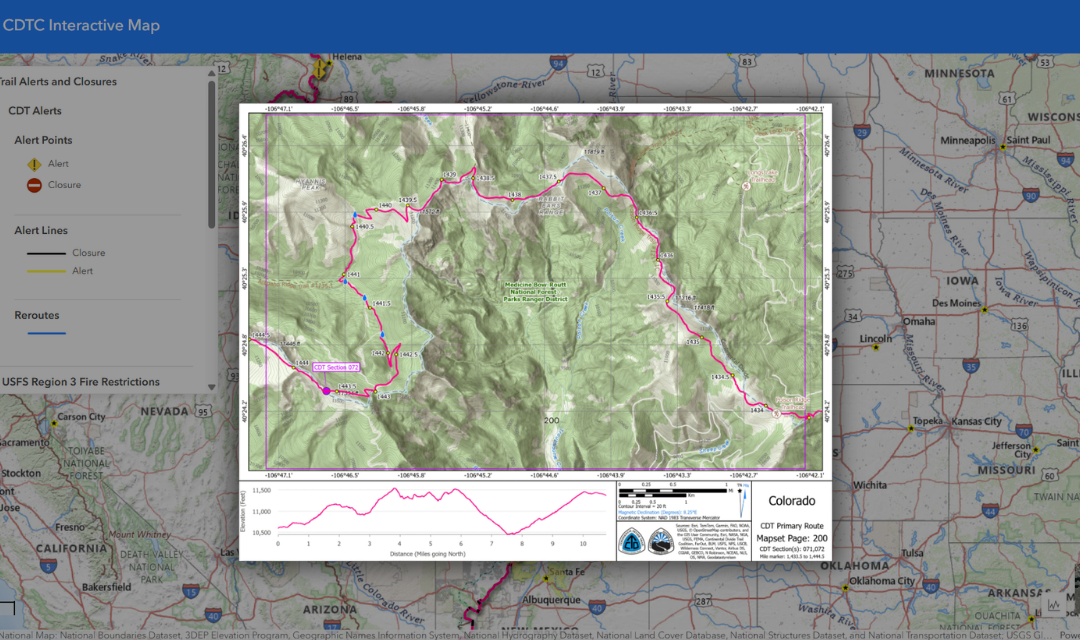
STEP 6: In the window that opens, click the download icon to save the PDF on your device.
Clicking the link will open a new browser tab hosted securely via Dropbox, displaying the PDF of the map page along with its elevation profile and essential data. To save it, simply navigate to the top right corner of the screen and click the “Download” icon (a downward-facing arrow with a line under it).
You can now print the map or save it to your phone for offline use!

 New for 2026
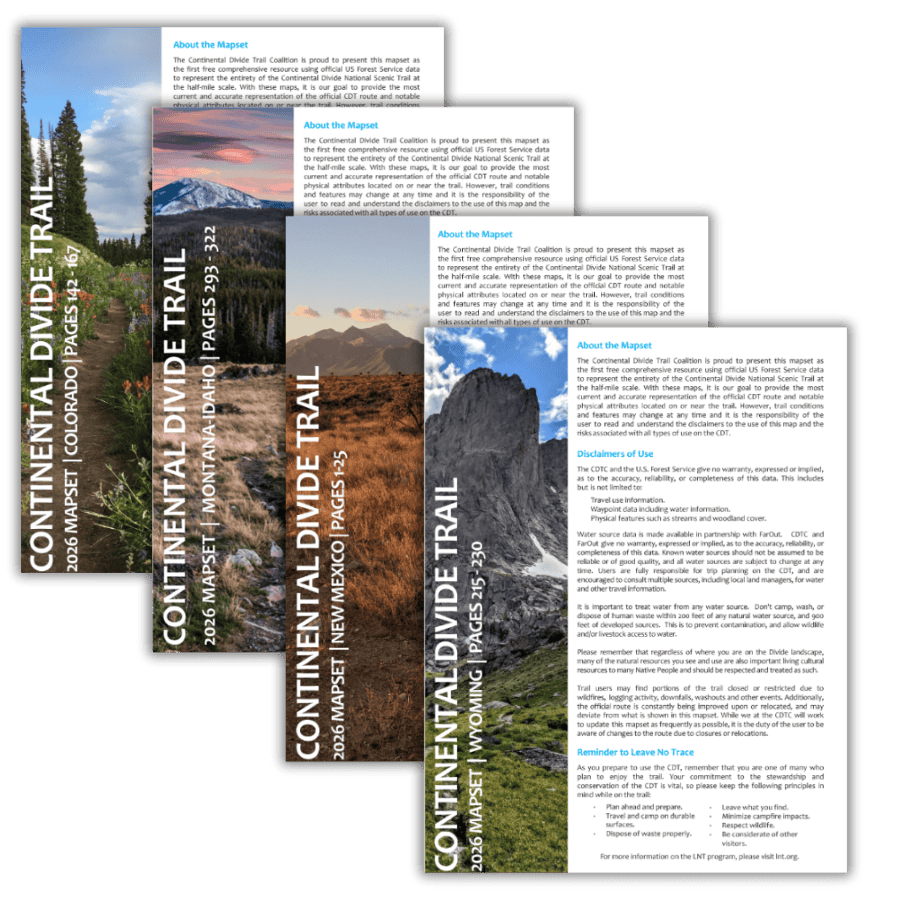
Download Complete CDT Map Sets by State
Want every section map in one download? Our updated 4th edition state map sets feature land ownership layers and the most current CDT centerline data available — the same maps you can grab individually through the interactive map above.
Browse Map SetsBefore You Go...
Having reliable physical or downloaded maps is a vital part of backcountry safety and Leave No Trace principles, ensuring you stay on the official tread and protect the fragile landscapes of the Divide. Take some time to explore the Interactive Map before your next trip, and remember to check for any active alerts or closures.
If you find these free mapping resources valuable, consider becoming a CDTC member or volunteering with us to help sustain the Continental Divide National Scenic Trail for generations to come!
Keep the CDT On the Map
CDTC provides these detailed map sets and USFS data completely free of charge to ensure the Continental Divide Trail remains safe and accessible for everyone. But maintaining these resources, managing trail data, and protecting the landscapes of the Divide takes ongoing work. If you found this tutorial helpful, consider supporting the trail you love with a donation of any amount.